Sensory Bags from Newborn to Toddler: Growing Interest!
When Bear was a newborn, he was introduced to sensory bags (also called sensory mats or pat mats) during tummy time at Baby Sensory class and he quickly became fascinated. They’re SO easy to make at home so my mom and I made several bags together. As he grew older and transitioned from an infant to a toddler, his interest in the sensory bags never waned.
In fact, he seems to discover new ways to engage with them at each stage of his development.
DIY sensory bags are truly a cheap, fun activity that actually provides some great benefits for your little one. Making them also scratches that crafting itch many of us moms have without taking up too much time or money!
I’ve made the bags we made for 12 months now and they’re still going strong! So for a DIY they are surprisingly durable and long-lasting.
The Benefits of Using a Sensory Bag
While sensory bags are not a traditional Montessori material or activity, they can be used in a Montessori-aligned way. Here’s my take on how sensory bags can align to a Montessori-inspired home environment.
Fostering Independence and Exploration
One of the core principles of the Montessori method is to encourage children to learn through independent exploration. Sensory bags align perfectly with this concept, as they provide a safe and controlled environment for your child to discover new textures, colors, and objects on their own. By manipulating the bag and uncovering hidden treasures, children can engage in self-directed learning, a cornerstone of Montessori education.
Building Concentration and Focus
In Montessori classrooms, children are encouraged to engage in activities that require focus and concentration. Sensory bags can serve as an excellent tool for developing these skills within your home environment. As children navigate through the bag’s contents, they must pay close attention to the different objects and textures, fostering their ability to concentrate on a specific task.
Promoting Fine Motor Skills
Developing fine motor skills is essential in Montessori education, as it prepares children for practical life activities and future academic work. Sensory bags provide a fun and engaging way for children to practice these skills. As they grasp, squeeze, and manipulate the bag, they are strengthening their hand muscles and improving their hand-eye coordination, paving the way for future success in activities like writing and using tools.
Enhancing Sensory Awareness
Sensory awareness is an important aspect of Montessori education, as it helps children develop a better understanding of their environment. Sensory bags offer a unique opportunity for children to explore various textures, shapes, and colors in a safe and controlled manner. By engaging with the sensory bag, children can heighten their tactile and visual senses, making them more aware of the world around them.
Encouraging Calm and Mindfulness
Montessori education emphasizes the importance of creating a calm and peaceful learning environment for children. Sensory bags can play a role in supporting this goal, as they provide a soothing and relaxing sensory experience. The act of squishing and manipulating the bag can have a calming effect on children, helping to reduce stress and anxiety. This, in turn, can create a more focused and serene learning environment, in line with Montessori principles.
The DIY Sensory Bag: A Step-by-Step Guide
Making a sensory bag is surprisingly simple, and you only need a few materials:
- Laminating pouches (I recommend the heavy-duty ones for durability)
- A hair straightener
- Your choice of gel or liquid (I used clear hair gel as well as baby oil with food coloring)
- Various small objects for your child to explore (make sure they’re not sharp as you don’t want to risk piercing the bag)
Step 1: Sealing the Sides
Begin by sealing three out of the four sides of the laminating pouch with a hair straightener. You don’t really need to seal the bottom edge as it’s already “sealed” but I like the look of all edges having a nice even border.
I found that the highest heat setting on my straightener worked best.
Be sure to leave one side open for filling the bag!
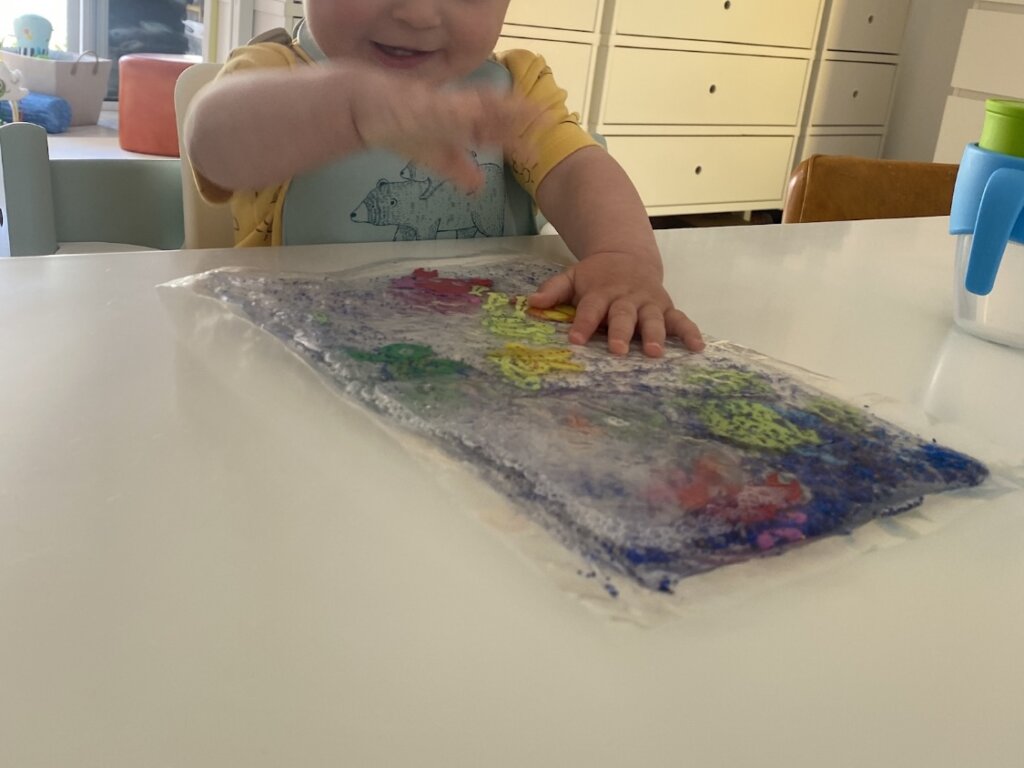
Step 2: Get Creative with Filling the Bag
Now comes the fun part: filling your sensory bag! Start by adding the small objects you’ve chosen for your child to explore. In Bear’s bag, I included colorful buttons and sequins. But don’t be afraid to get creative with your choices! You can use beads, glitter, small toys, or anything else that will capture your child’s attention.
Step 3: Partially Seal and Final Edge
Once I’d added the objects, I found it useful to seal three quarters of the final edge before adding the liquid. It made it easier to finish sealing once the liquid was added because there is only a small area left to seal.
Step 4: Add Your Liquid
Squeeze a generous amount of gel into the pouch. I used about half a bottle of hair gel, but you can adjust the amount to your preference. Experiment with different liquids and volumes to achieve various effects.
Step 5: Finishing Sealing the Final Edge
Once you’re happy with the contents of your sensory bag, carefully use the hair straightener to seal the remaining open edge. Ensure the seal is secure to prevent any gel or objects from escaping during playtime.
I usually do a final run across all four sides with the hair straightener to ensure it’s sealed tight!
Step 6: Playtime with Your Sensory Bag
Now that your sensory bag is complete, it’s time to let your child explore!
Encourage them to touch, squish, and manipulate the bag, discovering the various objects hidden within. You can also use this opportunity to engage your child in conversation, asking questions about the colors, shapes, and textures they’re experiencing.
A Rediscovered Love for Sensory Bags in Toddlerhood
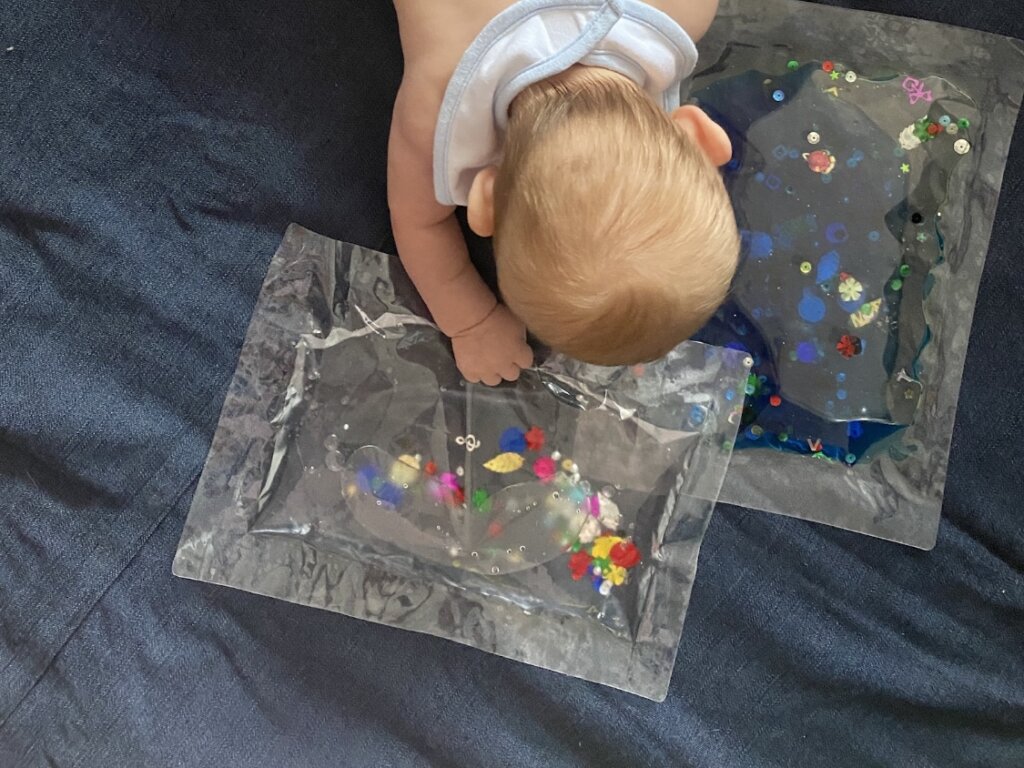
Bear’s fascination with sensory bags seems to have grown stronger as he has transitioned into toddlerhood.
He loves squishing the bag, watching the gel move around and revealing the hidden treasures inside.
He also loves holding the bag up to his face and looking through the different colored liquids and laughing. As seen below >.<

It’s clear that this simple DIY project provides him with endless entertainment, and I’m thrilled to watch his fine motor skills and curiosity grow with each play session.
Theme Ideas For Your Own DIY Sensory Bags
So, have I convinced you to try making your own sensory bag? Well if I have… here’s some themes and ideas you can try!
1. Autumn Leaves Sensory Bag
Celebrate the beauty of fall with an autumn leaves-themed sensory bag. Fill the bag with clear hair gel or baby oil, add colorful leaves, and sprinkle in few small flowes. Your child will love watching the leaves float and swirl as they manipulate the bag.
2. Spooky Halloween Sensory Bag
Create a spooky sensory experience with a Halloween-themed bag. Fill the bag with orange or purple hair gel (again use food coloring if needed) and include items like small plastic spiders, googly eyes, and rubber bats. This bag will be a fun and creepy addition to your child’s Halloween festivities.
3. Winter Wonderland Sensory Bag
Embrace the magic of winter with a snow-themed sensory bag. Fill the bag with a mixture of hair gel and iridescent glitter to mimic the appearance of snow. Add small snowflake confetti or even desiccated coconut to create the snow! Add snowflake sequins and white pom poms for your child to discover as they explore their very own winter wonderland. You could also mix things up and use shaving cream as a base for this bag.
4. Valentine’s Day Sensory Bag
Spread the love with a Valentine’s Day-themed sensory bag. Fill the bag with pink or red hair gel (you can use food coloring to tint clear hair gel if needed) and include heart-shaped confetti and small plastic gems for added sparkle. Your child will love exploring this heartfelt sensory experience.
5. Under the Sea Sensory Bag
Dive into an underwater adventure with an under-the-sea-themed sensory bag. Fill the bag with blue hair gel or water beads to create an oceanic environment. Include small plastic sea creatures, seashells, and colorful beads to represent coral reefs, allowing your child to explore a world beneath the waves.
6. Space Sensory Bag
Ignite your child’s imagination with a space-themed sensory bag. Fill the bag with clear hair gel, and add silver or gold glitter to create a starry sky effect. Include glow-in-the-dark stars for an out-of-this-world sensory experience that is extra special at night!
7. Rainy Day Sensory Bag
Embrace the calming effect of rain with a rainy day-themed sensory bag. Fill the bag with baby oil, blue food coloring and water beads. Your child can enjoy the soothing effect of a rainy day from the comfort of their play area.
8. Construction Site Sensory Bag
Encourage your little builder with a construction-themed sensory bag. Fill the bag with clear hair gel or baby oil, and add small construction vehicles, plastic tools, and small Lego building blocks. Your child will love discovering the various elements of a busy construction site!
9. Dinosaur Sensory Bag
Travel back in time with a prehistoric dinosaur-themed sensory bag. For this one, I’d opt out from using any liquid and instead use different textures like rice, quinoa or oats to create an earth/soil effect. Include small dinosaur figurines and some small shells as fossils, and your child will have a roaring good time exploring their ancient sensory world.
The Bottom Line
As a parent, I highly recommend giving DIY sensory bags a try! They are not only a cost-effective and entertaining activity for your child but also a fantastic way to support their development. You can customize them to suit your child’s interests and needs, making each sensory bag a unique and engaging experience.
Bear’s continued fascination with sensory bags has inspired me to experiment with different fillings, textures, and objects. As he grows older and his interests change, I can easily adapt the contents of his sensory bags to keep him engaged and learning.
So, if you’re looking for a fun and educational activity to bond with your child and support their development, why not give DIY sensory bags a shot? You might just find that your little one, like Bear, discovers a whole new world of exploration and wonder.
Happy crafting, and I hope your child enjoys their sensory bag adventure as much as Bear has!